+977 9841319155

Mera Peak Climbing

$2590
Duration
18 days
Max People
20
Min Age
18
Tour Type

Description

Why not Mera Peak Climbing in your bucket list after a tough trekking adventure in Nepal? The experience will be unreal and the achievement will be a talk for years.

But let’s be real, conquering a 6,476m (21,247 feet) will be a challenging fret and 18 Days itinerary is a no joke at all.

That said, with an 80-90% high success rate in Mera Peak Climbing, we can take you to the peak of Mera because it’s what we are here for. The reaming percentage comes from your effort which is not a big deal.

  1. Quick Check: Cost Inclusion & Exclusion
  2. Packing List for Mera Peak Climb
  3. Useful Information

In this 18 Days itinerary Mera Peak plan, we have covered all the fundamental requirements for climbers like:

  • Acclimatization schedules
  • Climbing techniques
  • Gear Lists
  • Guides & Porters
  • Food & Accommodation

Starting with the basic information that you need to know about Mera Peak:

  • Mera Peak Difficulty Level: Moderate to Challenging level, suitable for trekkers with some prior experience in high-altitude climbing. It involves basic mountaineering skills, including the use of crampons and ice axes on steeper sections
  • Climbing Season: The best times to climb Mera Peak are during spring (March to May)and autumn (September to November) when weather conditions are more stable
  • Permits: Mera Peak climbing permit, Sagarmatha National Park Entrance Fee.
  • Key Techniques Required: Use of Ice Axe & Self-arrest, proper use of crampons on icy terrain, Effective use of trekking poles
  • Oxygen Requirements: Supplemental Oxygen is generally not required for Mera Peak. However, climbers should be aware of altitude sickness symptoms and take precautions such as gradual ascent and hydration
  • Summit Day Preparations: Summit starts early in the morning (around 2 Am) to reach Mera Peak before noon

So, why Mera Peak? What’s the big deal?

You may know Mount Everest as the tallest mountain in the world, but among trekking peaks, Mera Peak is the highest. Cool right?

Talking about the experience, adventure, thrills, suspense – Mera Peak has got it all & without the technical requirements that you might find on other peaks. It also has the highest success rate among other peaks.

However, peak is a peak, and you will still need some solid preparation, both mentally and physically. Only then, you will finally enjoy the 360-degree panoramic views of five of the world's six tallest peaks: Mount EverestKanchenjungaLhotseMakalu, and Cho Oyu.

Mera Peak Climbing Overview:

Mera Peak Climb is considered as one of the adventurous & non-technical climbs that rises to the south of Mount Everest. But this climb is not for couch potatoes.

mera-peak-climbing

How tough is it? Difficulty Level

According to Alpine Grading System, Mera Peak Climb is graded as PD, meaning it possess some challenges that even veteran trekkers will find it hard. However, the route to the summit is generally non-technical, making it suitable for novice climbers who have some trekking experience.

The toughest part? The altitude.

After crossing above 3,500m high altitude, there is always a risk of altitude sickness. That’s why an acclimatization schedule is very important. We have acclimatization on Day 10.

Similarly, Day 12 will be the most challenging day during Mera Peak Climb which involves ascent to the summit.

The final section of the climb is steep and requires careful navigation, often involving the use of crampons and ice axes. Let’s not forget about the challenges of reduced oxygen level & potential AMS that climbers need to face.

Tip: If you’re new to high-altitude trekking, check out our guide on How to Prepare for High Altitude Climbing. It's packed with advice on staying strong at altitude.

Here is an outline of Mera Peak Climbing Itinerary:

  • Day 01: Arrival in Kathmandu, Nepal (4,593 ft) and transfer to Hotel via Private Vehicle
  • Day 02: Sightseeing inside Kathmandu Valley and Trek preparation
  • Day 03: Flight to Lukla (2860m) from Kathmandu or Ramechhap and trek to Paiya (2730m) | 30-minute flight and 3-4 hour trek
  • Day 04: Trek to Panggom (2846m) – 5/6 hour
  • Day 05: Panggom to Ningsow (2863m) – 4/5 hour trek
  • Day 06: Trek to Chhatra Khola (2800m) – 7/8 hour
  • Day 07: Trek to Kothe (3691m) from Chhatra Khola – 6/7 hour
  • Day 08: Trek to Thagnak (4358m) 3-4 hour
  • Day 09: Trek to Khare (5045m) – 2/3 hour
  • Day 10: Khare: Acclimatization and pre-climbing training
  • Day 11: Trek to Mera High Camp (5780m) – 6/7 hour
  • Day 12: Climb to Summit (6461m) and return to Khare (5045m) – 8/9 hour
  • Day 13: Reserve Day for Contingency
  • Day 14: Trek to Kothe (3600m) – 4/5 hour
  • Day 15: Trek to Thuli Kharka (4300 m) – 5/6 hour
  • Day 16: Trek to Lukla (2642m) – 6/7 hour
  • Day 17: Fly back to Kathmandu (1400m) – a 30-minute flight
  • Day 18: Departure from Kathmandu

Similarly, this 18 Days route is also called Route 2 and the safest route for Mera Peak Climbing.

What’s the Route 1?

Route 1, also known as the Zatrwa La Pass route is the most challenging, shortest, and high-risk route for climbing Mera Peak. The success rate from Route 1 is also very low and has high risk.

However, if you are ready for even Route 1 then we can talk someday. We are born to be ready, right?

Where is Mera Peak Located in Everest Region?

Mera Peak location lies in the Mahalangur range of the Nepalese Himalayas, specifically in the Solukhumbu District of Province 1. Here are some details about the location:

  • Coordinates: Approximately 27° 42' 31" N latitudeand 86° 52' 14" E longitude
  • Nearby Settlements: The nearest major settlement is Lukla, which serves as the gateway to the Everest region and is approximately 8 kilometersaway from Mera Base Camp.

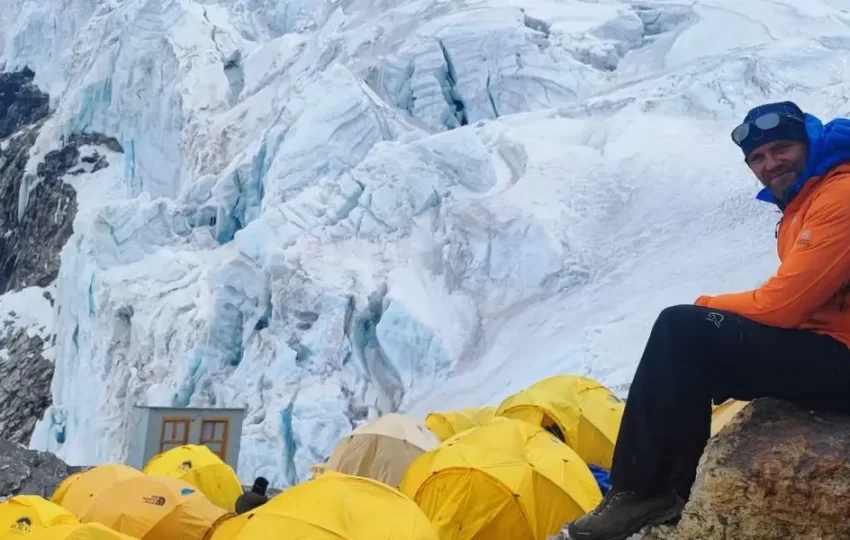
Most importantly, the tea houses are primarily located in the lower & mid altitude areas, such as Kothe Thagnak (Thaknak), and Khare. Above Khare, it is all tent camping due to location.

Challenging the hardest Day 11 and 12 of Mera Peak:

mera-high-camp

Grab a cup of tea & note down these two most challenging days you’ll face on the entire journey.

The difficulty level of Day 11 & 12 rise from challenging to extreme. The first experience of high altitude of 5,780m will start to kick you off. It will feel like climbing the Eiffel Tower twice, but with low oxygen.

Besides that, the trail includes steep sections & rocky moraine, requiring careful footing placement to avoid slips & injuries. At the end of the trek, it involves navigating through boulder-strewn paths & unstable grounds, which will take all your energy.

And you know what? The trek lasts approximately 6 to 7 hours. Are you ready for this level of challenge? It’s only on Day 11, and you will need to face Day 12 after all these challenges.

Summit Day 12 & Return to Khare:

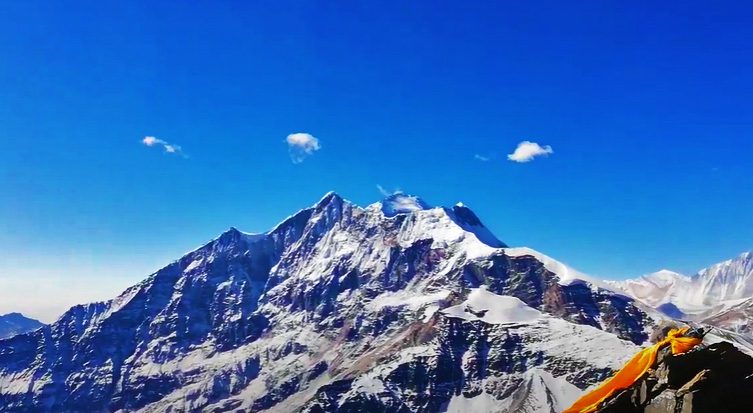
This is what human have achieved and you will achieve, 6,461m altitude “The Highest Trekking Peak” – “Mera Peak”.

The climb will begin early in the morning around 2 AM to take the advantage of firmer snow conditions.

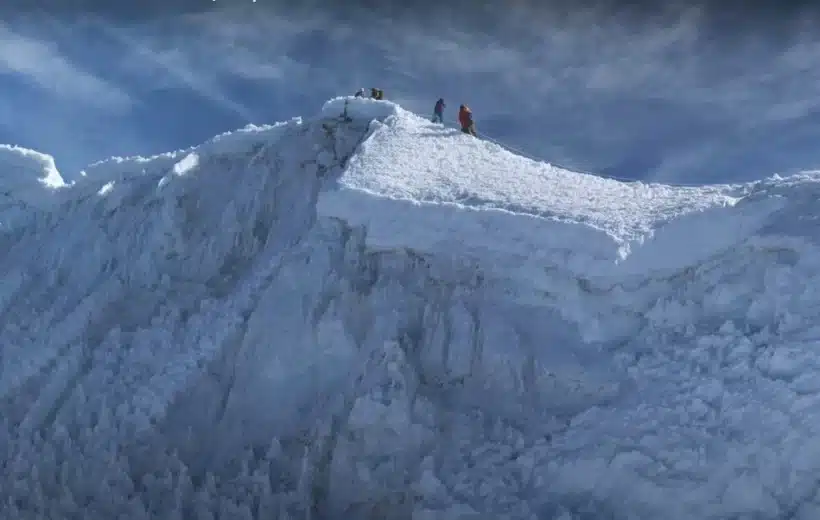
The ascent involves navigating steep snowfields and potentially icy terrain, with slopes reaching up to 30 degrees in some sections.

Now, I’m not going to lie to you – you’ll need some skills for the Day 12. Although not extremely technical, just skills of using crampons and ice axes. You might also need to use fixed ropes for the final push to the summit.

It’s showtime!

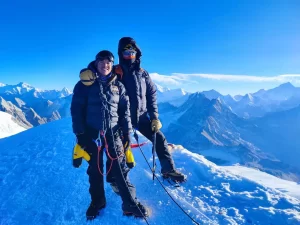
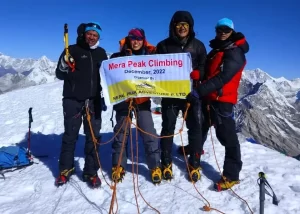
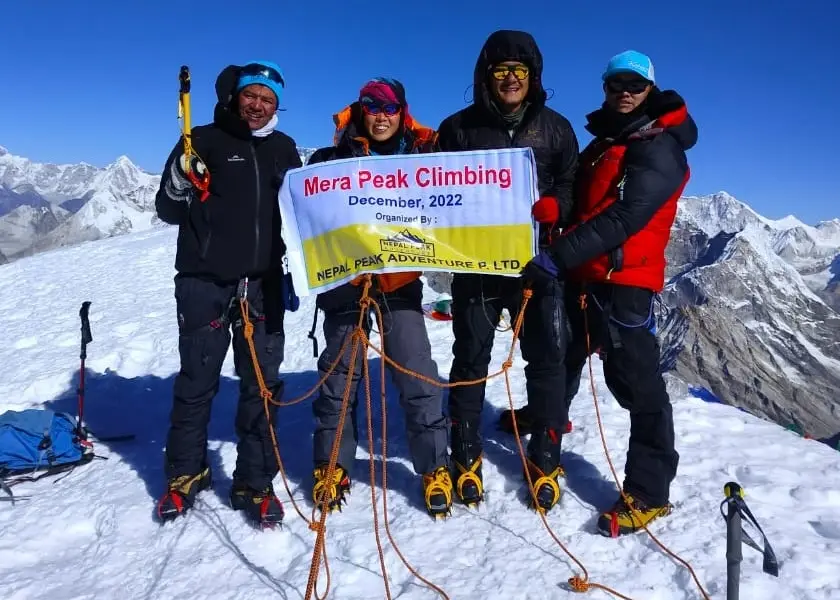
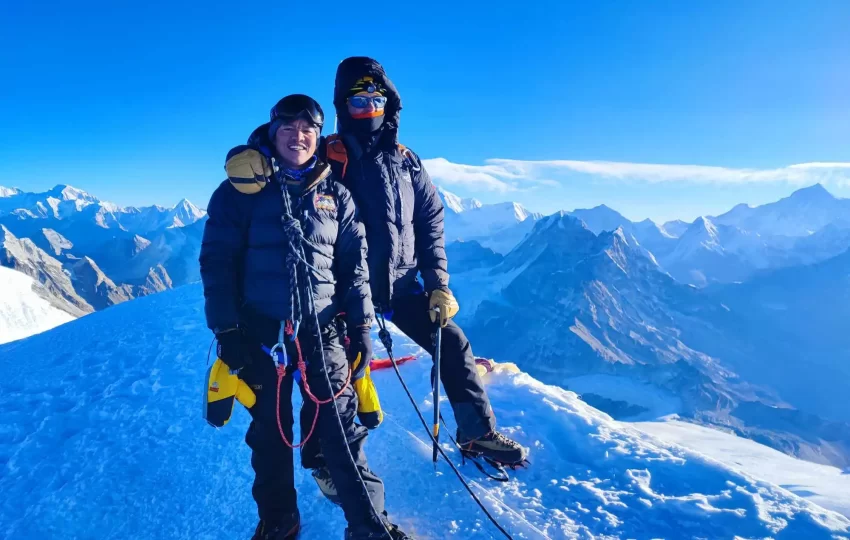
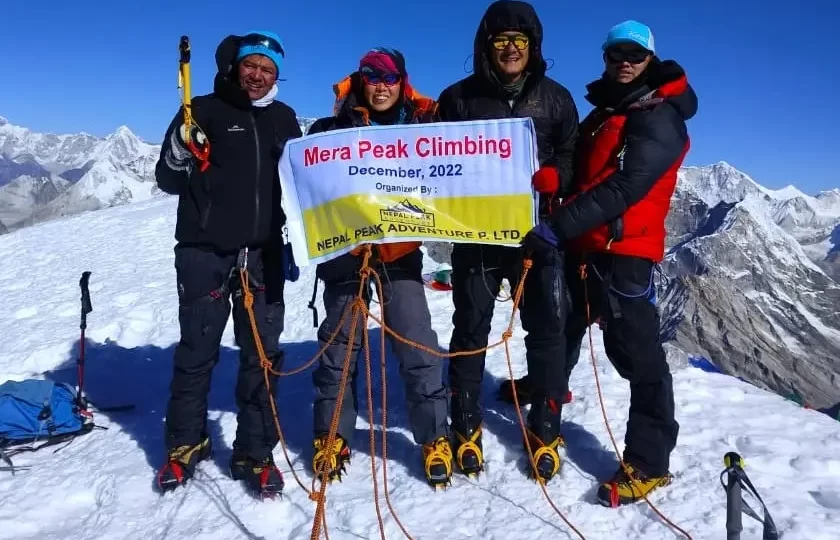
After all those hours of climbing, you will reach the summit 6,461m. You are now the elite human being that have stepped in Mera Peak. You will see the Mount Everest, Lhotse, & Makalu. Everything will be in your eyes.

To break you up, it’s only half of the journey as you’ve still got to get back down to Khare.

Now, you will feel like walking in the park to descend down to Khare. The total duration of Day 12 will be around 8 to 9 hours.

What makes it possible?

Your effort, climbing guide, preparation, and the fundamental services that all climbers need to get.

Service Inclusion and Exclusion in Mera Peak Package

We handle all the necessary service for peak climbing so that you can only focus on Mera Peak. Here’s a list of services that are included in the package:

Included Service:

Transportation:

  • Airport pick-up & drop-off service in a private vehicle.
  • Domestic Flights from Kathmandu to Lukla or Ramechhap to Lukla, including all airport taxes. No hidden charge.

Cultural Experience:

  • Welcome Dinner at a reputable Nepalese Restaurant with a Nepali Cultural Program.
  • Farewell Dinner.
  • Certificate of Achievement from company upon completion of the climb.

Guide & Porters:

  • Experienced, Government-licensed trekking Guide.
  • One porter for every two trekkers for the trek.
  • Assistant Guides as per the group size for the trek.

Accommodation:

  • Accommodation in Kathmandu (3N) and carefully selected Tea houses during trek.
  • Tented accommodation during the climbing phase.

Meals:

  • Full board meals (Breakfast, Lunch, and Dinner) provided during the trek and climbing phase.
  • 3 Cups of Tea/Coffee per day during trekking times.
  • Seasonal Fruits after Dinner during trekking.

Permits & Fees:

  • Mera Peak Climbing Permit.
  • Khumbu Pasang Lhamu Rural Municipality entrance fee.
  • Sagarmatha National Park Entry Permit Fees.

Equipment and Supplies:

  • Group climbing equipment, including stoves & fuel.
  • First aid medical kit and an oximeter for health monitoring carried by the guide.
  • Duffel Bag (free), Trekking Map(free), t-Shirt,s Down Jacket & Sleeping Bag (upon request) for the journey.

Safety:

  • Managing the Emergency Helicopter evacuation service according to your travel insurance.

Excluded Service:

We do not cover the following expenses and excluded in the service.

Isnternational Flights:

  • Flights to and from Nepal are not included in the package price

Extra luggage weight costs:

  • Extra luggage costs in domestic flights.

Personal Expenses:

  • Cost for personal items, snacks, drinks, or additional meals outside of what is provided in the package.

Travel/Trekking Insurance:

  • Trekkers are required to arrange their own travel insurance that covers high altitude & Helicopter evacuation.

Tipping:

  • Tipping to guide or porters.
  • Any other staff.

Additional Days:

  • We do not cover the expenses of additional days, additional meals, additional accommodation.

Medical Expenses:

  • Any medical costs incurred during the trek or climb are not covered by the package.

Equipments:

  • Climbing equipment or trekking equipment’s for personal uses.

Understanding these inclusions and exclusions will help you prepare adequately for your Mera Peak expedition, allowing you to budget appropriately and ensure you have all necessary arrangements in place for a successful climb.

Note: If you have any doubts then you can contact us or you can read the terms & conditions section 1.3, 1.5, 2.1, & 3.0.

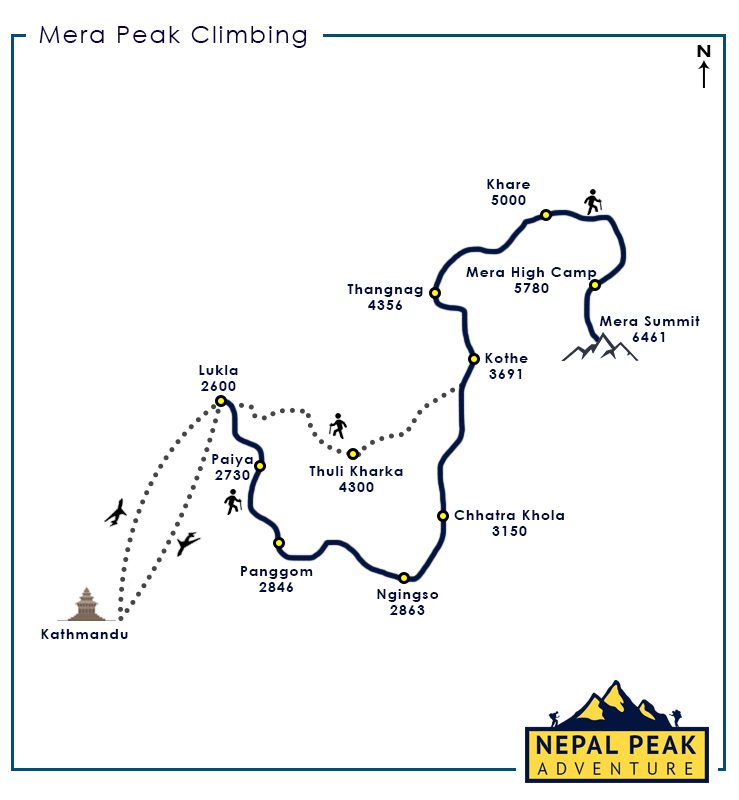
Mera Peak Outline Map:

mera-peak-climbing-map

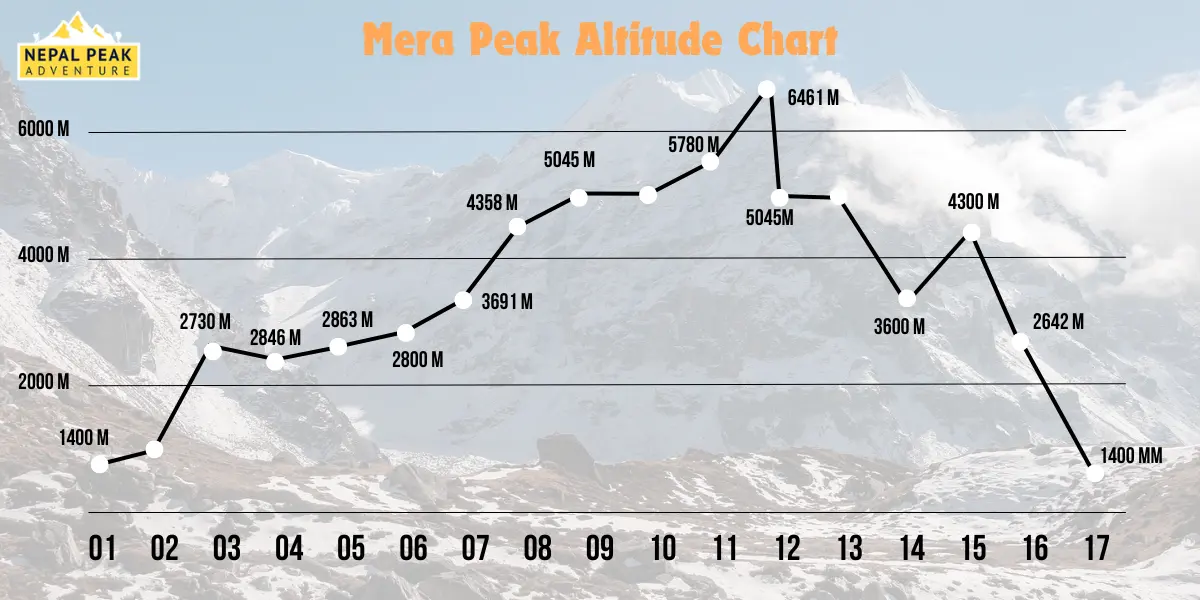
mera-peak-altitude-chart

Let’s talk about altitude gains, altitude sickness and altitude prevention in short here.

Altitude sickness has become the most common concern for climbers & trekkers. For those attempting Mera Peak, from Day 7 to Day 14 according to altitude chart, climbers face the risk of AMS.

Symptoms of AMS are seen among climbers which can range from mild to severe like:

  • Mild Symptoms: Headaches, nausea, dizziness, fatigue, and difficulty sleeping
  • Severe Conditions: High altitude pulmonary edema (HAPE) & High-altitude cerebral edema (HACE), which are life-threatening and require immediate descent or evacuation.

The risk of altitude sickness increases with rapid elevation gain without adequate acclimatization. Therefore, we advise climbers to take the ascent slowly, take enough minerals, nutrition’s and avoid alcohol or caffeine.

If you understand more about altitude and preparation, you will successfully ascent Mera Peak.

Mera Peak Climbing Equipment Checklist:

Now, it is time to either plan or check your gears and equipment for the Mera Peak Climbing. Below is a detailed checklist categorized into essential gears, clothing, medical supplies, and miscellaneous items.

If you want to know why these gears are important, how to pack & more detail then you can check our “Ultimate Mera Peak Packing List”. So, back to the point:

Climbing Gears:

  • Climbing Boots: Insulated and compatible with crampons.
  • Crampons: For traction on snow and ice.
  • Ice Axe: Necessary for stability on steep sections.
  • Harness: Comfortable and adjustable for securing to ropes.
  • Helmet: UIAA certified for head protection.
  • Prusik Rope: For climbing safety and rope rescue.
  • Carabiners: At least three screw-gate carabiners.
  • Trekking Poles: Adjustable for support during hikes.
  • Backpack: 50-70 liters capacity for multi-day trekking.

Clothing For trekking:

  • Base Layers: Moisture-wicking long-sleeve tops (synthetic or merino wool).
  • Mid-Layers: Fleece jackets or lightweight sweaters.
  • Outer Layer: Waterproof and windproof hardshell jacket.
  • Trekking Pants: Lightweight, quick-drying pants (with zip-off legs if possible).
  • Waterproof Trousers: To wear over trekking pants in wet conditions.
  • Insulated Pants: Optional for summit day or cold weather.
  • Warm Hat: Covers ears; essential for warmth.
  • Face Mask/Scarf: For protection against wind and cold.
  • Gloves: Lightweight synthetic gloves and thicker insulated gloves.
  • Thick Socks: Multiple pairs for warmth.
  • Mountaineering Boots: Sturdy boots suitable for high altitudes.
  • Camp Shoes/Sandals: Comfortable footwear for use at base camp.

Medical supplies:

  • First Aid Kit: Customized for high-altitude health issues.
  • Anti-diarrhea medication, cough medicine, antibiotics, etc.
  • Medicine for altitude sickness prevention.

Miscellaneous Items:

  • Sleeping Bag: Four-season sleeping bag rated for sub-zero temperatures.
  • Sleeping Mat: Insulated for comfort during cold nights.
  • Water Purification Tablets: To ensure safe drinking water.
  • Hand Sanitizer, sun cream, lip balm.
  • Camera and Spare USB Cards: To capture memories of the climb.
  • Plastic Bowl, Spoon, Coffee Mug, pocket knife, repair kit.

Pro Tip from a Fellow Climber:

  • Pack items in durable, waterproof bags to protect against moisture.
  • Consider leaving non-essential items at your hotel in Kathmandu to lighten your load during the trek
  • Always check the weather conditions before departure to adjust your gear accordingly.

So, there you have it, friend. The basic needs for Mera Peak climbing, straight from someone who's been there, done that, and got the frostbitten t-shirt. If you want to include extra things to help you for the journey then feel free to do so.

Useful Information About Mera Peak:

Altitude Sickness

Altitude Sickness should not be taken lightly. It's like the worst hangover you'll ever had, minus the fun night out. Headaches that feel like a brass band's taken up residence in your skull, nausea that has you hugging the nearest rock, and dizziness that makes you question which way is up. Fun times, right?

But here's the kicker - it doesn't have to be that way. With a bit of know-how and some smart planning, you can give altitude sickness the slip and enjoy your climb.

First things first, acclimatisation is your new best friend, hydration is the second, and resting is the third. Take your time, especially when you hit Khare at 5,045 metres. Spend a couple of nights there, let your body get used to the thin air.

Now, let's talk about staying hydrated. Leave the booze and fags at home. Take only water with hydration tablet, maybe hot water and drink plenty.

Oh, and here's a pro tip: keep an eye on your mates. If someone starts looking a bit peaky (pun intended), it might be time for a breather or even a trip back down. Better safe than sorry, eh?

Now, I know what you're thinking. "But I'm fit as a fiddle! I'll be fine!" Well, let me tell you a little story. I once knew a bloke, built like a brick house, could run marathons for fun. He thought he'd breeze up Mera Peak. Guess who ended up feeling like a sack of potatoes at 5,000 metres? Yep, Mr Marathon himself. The moral of the story? Get fit, sure, but respect the mountain. It's a whole different ball game up there.

So, there you have it, folks. My two cents on tackling Mera Peak without letting altitude sickness spoil the fun.

Preparation and Training for Mera Peak

Alright, now we are ready for preparation and training for Mera Peak Climb. First things first, you've got to get your body ready. I'm talking about a good 3 to 6 months of solid training before you even think about setting foot on that mountain.

6 months!! Are you for real? But hear me out.

There’s cardio (running, cycling, swimming, hikes) a few times a week. Let’s not forget those legs and core (Squats, Lunges, deadlifts).

Oh, and here’s a top tip – start planning some longer hikes that includes 6 hours walk. Slowly increase the weight of your backpack and altitude.

Another thing, you've got to know your stuff too. Ever tried walking in crampons? Have you used ice axes before? Find a good guide who can show you the ropes (literally). They'll teach you how to use all the gear and, more importantly, how not to use it.

Best Time for Climbing Mera Peak

Without any doubt, spring (March and May) and autumn (September to November) are your best mates when it comes to climbing Mera Peak.

During Spring Season, weather will be good (nor hot nor cold), temperatures around -10°C to -5°C up top. The views? Absolutely stunning.

Snow-capped peaks as far as the eye can see, and if you're lucky, you might catch the rhododendrons in bloom during your trek.

Then there’s Autumn, from September to November. The skies are clearer than a freshly wiped window, the temperature is about -15°C to -5°C at the summit.

Travel Insurance

Travel Insurance is most important when you are about to travel Nepal and climb Mera Peak 6,476m. Well, first off, make sure it covers high-altitude climbing. We're talking above 6,000 metres here, folks. Your standard holiday insurance won't cut the mustard.

Next up, medical evacuation. Now, I'm not trying to scare you, but if things go pear-shaped up there, you might need a helicopter ride. And let me tell you, it's not the kind of scenic flight you want to be paying for out of pocket.

Oh, and here's a top tip: check if they cover pre-existing conditions

Now, when you're shopping around for insurance look for companies that specialise in adventure sports. They know their stuff when it comes to covering mad folks like us who enjoy climbing mountains for fun.

Note: There is no travel insurance in Nepal that covers 6,000m and Heli evacuation.

Mera Peak FAQs:

How much will I spend for whole Mera Peak climbing?

Besides the package price which is $2,590 you will be spending another $500 to $1500 on personal expenses in average. However, if you are in a group, you will get a discount in the package price which can save you some money.

Between Mera Peak and Kilimanjaro, which is harder to climb?

If we compare the Mera Peak and Kilimanjaro, Mera Peak is more difficulty due to high altitude of 6,476 meters, steep sections, and involving the use of crampons, and ice axes. Whereas Kilimanjaro is only 5,895 meter, and does not require technical climbing skills.
 

Tour Plan

Expand All
Day 1: Arrival in Kathmandu Airport and Settling In:

30 min Drive
Accommodation: Blue Horizon Hotel


After landing at Tribhuvan Airport in Kathmandu, you’ll need to handle your “On-Arrival Visa” if you don’t have one sorted already. Don’t stress; we’ll guide you through all the airport formalities via What’s App.

As you step out, one of our friendly team members will be waiting for you, holding up a sign with your name on it. No guesswork here!

From the airport, we’ll head to your hotel in Thamel, which takes around 35 to 45 minutes. It’s a great time to get your first feel of Kathmandu’s vibe.

And don’t worry about dinner – we’ve got that covered. You’ll enjoy a traditional Nepali meal at one of the city’s well-known restaurants, complete with a vibrant cultural dance performance. It’s a perfect welcome to Nepal.

Day 2 Explore Kathmandu (1400m) while we Prepare your Documents & Permits:

Today’s all about soaking in Kathmandu’s culture and history. We’ll hit some of the city’s iconic spots, like ancient temples, Durbar Square, and those famous stupas you’ve probably heard about. It’s a great way to get a feel for the rich history and spirituality of Nepal.

After our sightseeing tour, we’ll head back to the hotel. If you need to exchange money or grab any last-minute trekking gear, today’s your chance. Tomorrow, the real adventure begins, so let’s make sure you’re all set.

Day 3 Flight from Kathmandu/Ramechhap to Lukla (2860m) and trek to Paiya/Puiya (2730m)

Trek Distance: Approximately 10 km
Average Duration: 3-4 hours
Difficulty Level: Moderate


Here’s where things get exciting! Depending on the season, we’ll either catch a flight to Lukla directly from Kathmandu or drive to Ramechhap Airport first (a 4-5hour drive) for the flight. The flight to Lukla itself is an experience, with jaw-dropping mountain views in just 15-20 minutes.

Once we arrive in Lukla, you’ll meet your porter, take a short break, and then we’re off.

After arriving at Lukla, you will meet your porter there and you will have a short break at Lukla. After some breaks, the trek will start from Lukla to Paiya.

Our first trek will lead us to Paiya (or Puiya), a quaint village that’s popular with trekkers heading toward Mera Peak. The trail winds through the lush Dudh Koshi River valley and offers stunning views as we make our way up to Chutok La, a mountain pass, before descending into Paiya for the night.

Day 4 Trek from Paiya/Puiya to Panggom Trek (2,850m)

Trek Distance: Approximately 12 Kilometers
Average Duration: 5 to 6 hours
Difficulty Level: Moderate


We’ll kick off bright and early with a descent before crossing a bridge above Paiya Khola. From there, it’s a tough climb up to the Khari La Pass 3,145m, where you’ll want to watch your footing – the path can get a bit slippery.

But the effort is worth it as the views open up to stunning panoramas of the Dudh Koshi Valley and the distant Dudh Kund Himal.

If you are trekking during Spring season, you will be surrounded by Rhododendron & Bamboo forests.

Post-lunch, the trek takes us through narrow paths surrounded by bamboo and rhododendron forests. Eventually, we’ll make it to the village of Panggom 2,850m, where we’ll rest for the night.

Day 5: Trek to Ningsow (2863m)

Trek Distance: Approximately 8 km
Average Duration: 4 to 5 hours
Difficulty Level: Moderate


After a hearty breakfast, we’ll tackle the climb up to Panggom La Pass. The path leads us over a charming local stream called Peseng Kharka Khola and onwards to Peng Kharka Danda. Along the way, you’ll have plenty of chances to snap photos of the rolling landscapes and mountain views.

As you navigate the hills and ridge, you will be accompanied by the view of South Face of Mera peak.

Our day wraps up as we cross the Ningsow Khola and settle into Ningsow village, a quiet spot where we’ll spend the night. Although Ningsow is not at extreme altitude, but if you feel you need to take acclimatization the following day, we can customize it.

Make sure to have good sleep today in tea house.

This trek isn’t just about the destination – it’s about the journey, with each step offering new views and experiences.

Day 6: Ningsow to Chattra Khola Trek 2,800m

Trek Ditance: Approximately 10 km
Average Duration: 7-8 hours
Difficulty Level: Slightly Hard


Our journey today kicks off with a mix of ups and downs through lush Rhododendron forests, leading us to Ramailo Danda. It’s a perfect spot to catch your first real view of Mera Peak.

After a short break to take it all in, we continue onwards into the Makalu Barun National Park. Here, nature really starts to show off. Keep an eye out for wildlife, including the elusive red panda, as you traverse through forested areas.

We’ll then follow the Pasang Lhamu trail until we reach Chhatra Khola, where we’ll call it a day and settle in for the night.

Day 7: Trek to Kothe (3691m)

Trek Distance: Approximately 12km
Average Duration: 6-7 hours
Difficulty Level: Moderate


Today, we head towards the stunning Hinku Valley, following a relatively easy trail. As you progress, the trail offers stunning views of the Hinku Valley and Mera Peak.

Along the way, we’ll reach Tashinig Ongma, a seasonal teahouse stops where we’ll grab lunch and recharge. The trail is rich in biodiversity and features a variety of landscapes, including dense forests and open ridges.

After lunch, we continue trekking, crossing the Sanu Khola River, before arriving in Kothe for our overnight stay. The scenery just keeps getting better as we move deeper into the mountains!

Day 8: Trek to Thagnak (4358m)

Trek Distance: Approximately 7 km
Average Duration: 3-4 hours
Difficulty Level: Moderate


After a good breakfast, we’ll set off along the Hinku Khola. Our first stop is Gondishung, where we’ll pause for lunch.        Similarly, as you ascend, you'll notice a change in scenery from dense forests to more open landscapes with river rocks.

While we’re in Gondishung, we’ll visit the Lungsumgba Gompa, a 200-year-old monastery. Travelers often stop here for blessings from the local Lamas before their climb, and we’ll do the same.

After exploring the monastery and its peaceful cloisters, we’ll continue onwards to Thagnak, where we’ll rest for the night. Remember that from Kothe to Thagnak is not only vital for those aiming to summit Mera Peak but also offers a rewarding experience.

Day 9: Trek to Khare (5045m)

Trek Distance: Approximately 8 km
Average Duration: 5-6 hours
Difficulty Level: Moderate to Challenging


This is where the altitude really starts to kick in! We’ll begin by following the lateral moraine of the Dig Glacier until we reach Dig Kharka. The views here are incredible, especially of Charpate Himal.

The trail then leads us through rugged moraines up to the Hinku Nup and Shar glaciers. It’s a bit of a steep climb, but the views at the top are worth every step. We’ll finish the day at Khare, where we’ll stay overnight.

Day 10: Acclimatization and Pre-Climb Training

Today is all about getting our bodies and minds ready for the climb ahead. Khare is situated at 5,045 meters (16,486 feet), making it essential for climbers to acclimatize properly to reduce the risk of altitude sickness.

Thus, we’ll stay in Khare for acclimatization, allowing us to adjust to the higher altitude.

But it’s not just about resting – we’ll also do some practical training.

We’ll go over how to use climbing gear like ice axes, harnesses, and crampons. Plus, we’ll practice roping techniques to make sure everyone feels confident and safe for the ascent. Overnight in Khare.

Day 11: Trek to Mera High Camp (5780m)

Trek Distance: Approximately 4-5 km
Average Duration: 6-7 hours
Difficulty Level: Moderate to Challenging


Time to push higher! We’ll trek up to Mera Peak Base Camp, navigating a boulder-filled path on a steep incline. The trail takes us over the Mera La Pass, and soon we’ll arrive at Mera High Camp, our home for the night.

From here, the views are nothing short of spectacular – we’ll have Mount Everest, Makalu, Cho Oyu, and Lhotse all in sight. It’s a magical place to rest up before the final push.

Day 12: Climb to the Summit (6461m) and Return to Khare (5045m)

Trek Distance: Approximately 10-12 Round Trip
Average Duration: 8-10 hours round trip
Difficulty level: Challenging


Early Morning Departure:
We start early, waking up around 2 AM to get ready for the big climb. After a quick, warm breakfast, we’ll gear up with crampons, ice axes, and ropes. It’s important to head out before dawn so we can make the most of the calm morning weather.

Ascent to the Summit:

The climb begins with a gradual ascent across the glacier. The first part of the route leads us through snowfields, where we carefully navigate around crevasses.

As we climb higher, the slope steepens a little, but it remains manageable and non-technical. The ridge we follow offers stunning views of the surrounding peaks, which become more breathtaking the higher we go.

The final section of the climb involves a short but steep push before we reach the summit. It’s challenging, but incredibly rewarding.

Descent to Khare:

After spending some time at the summit—taking in the views, snapping photos, and celebrating the achievement—it’s time to begin our descent. We’ll carefully retrace our steps back down to High Camp, navigating any icy patches with caution. Once back at High Camp, we’ll take a short rest before continuing our descent to Khare.

The descent from High Camp to Khare typically takes around 3 to 4 hours, depending on conditions and pace.

By the end of the day, we’ll be back at Khare, tired but thrilled to have reached the summit!

Day 13: Reserve Day for Contingencies

Mountains are unpredictable, and sometimes plans don’t go exactly as expected. This day is reserved in case of any delays due to weather or other unforeseen circumstances. If everything has gone smoothly and the weather has been in our favor, we’ll skip this extra day and continue the journey.

Day 14: Trek Back to Kothe (3600m)

Trek Distance: 13 km
Average Duration: 4-5 hours
Difficulty level: Moderate


Today we retrace our steps back to Kothe. The trail is rugged, with sparse settlements and open fields along the way. Once we reach Kothe, it’s time to celebrate! You’ve conquered Mera Peak, and this is the perfect moment to toast your achievement with the crew. Overnight at Kothe.

Day 15: Trek to Thuli Kharka (4300m)

Trek Distance: Approximately 10 km
Average Duration: 5-6 hour
Difficulty Level: Moderate


Our trek today takes us through a series of ups and downs, crossing the Inkhu Khola river as we head towards Taktho. Along the way, we’ll pass a Chorten (a Buddhist shrine), and tackle a steep descent before climbing back up to Thuli Kharka.

There’s another Chorten we’ll pass just before we reach our destination for the night. It’s a peaceful spot to rest and reflect on the journey so far.

Day 16: Trek to Lukla (2800m)

Today marks the final stretch of our trek. We’ll start with a steady climb up to the Zatrwa La Pass before descending towards Lukla. The pass offers one last glimpse of the Himalayan range before we make our way down through the valleys. Once we reach Lukla, we can relax and look back on the incredible adventure we’ve had. Overnight in Lukla.

Note: We are ascending the Zartwa La Pass on this day which is the final day of the trek. So, don’t be confused with the Route 1 and Route 2 route. This itinerary is the safest route.

Day 17: Fly Back to Kathmandu (1400m)

We’ll catch an early flight back to Kathmandu, as weather conditions in Lukla can change quickly. The flight offers a final chance to see the mountains from the sky before we return to city life. Once we land, your guide will take you back to your hotel. The rest of the day is yours to relax, explore Kathmandu, or shop for souvenirs.

Notice: If your flight is in Ramechhap then we will send private vehicle for you to pick you up.

Day 18: Departure from Kathmandu

After 18 amazing days of adventure, it’s time to say goodbye. We’ll arrange for your transfer to Tribhuvan International Airport, where you’ll catch your flight home. Take with your memories of towering peaks, thrilling climbs, and the camaraderie of your trekking crew. Safe travels!

Things to do upon your Arrival at Kathmandu before your trek:

Upon your arrival at Kathmandu’s Tribhuvan International Airport, a representative from our company will be there to extend a warm welcome to you. You will then be swiftly transferred to the hotel in a private vehicle. Upon reaching the hotel, you can check in and take some time to relax. At the scheduled time, our company owner, Hom Rana, will personally greet you for the trip briefing on the Everest Base Camp Trek, providing comprehensive details.

During this briefing, we will carefully go through your packing list to ensure you have everything you need. Additionally, you will have the opportunity to meet your trek guide and receive essential items such as the company duffel bag, t-shirt, cap, and trekking map.

In the evening, we cordially invite you to join us for a welcome dinner hosted by the company. Following this, the next day you will embark on a flight to Lukla to commence your trekking adventure.

Lukla Flight Information (Kathmandu & Ramechhap):

We would like to update you on important changes regarding Lukla flights during peak trek seasons (March, April, May, October, and November). Due to increased air traffic in these months, Lukla flights will be operated from Manthali airport in Ramechhap instead of Kathmandu. However, during non-peak seasons (January, February, June, July, August, September, and December), Lukla flights will continue to operate from Kathmandu.

If you are catching a Lukla flight from Ramechhap, please be advised that you need to depart from Kathmandu early in the morning, around 1:30 to 2:00 AM. The journey from Kathmandu to Ramechhap takes approximately 4-5 hours. Your guide will arrive at your hotel at the specified time to pick you up and drive you to Ramechhap.

It’s important to note that Lukla flights may face disruptions due to factors such as bad weather, airline technical problems, and other unforeseen circumstances. Therefore, we recommend planning for an additional 2-3 days as a contingency to accommodate potential delays.

We appreciate your understanding and cooperation in adapting to these changes for a smoother and more enjoyable trekking experience.

Tea House Meals During EBC Trek:

Nepal Peak Adventure consistently provides our clients with top-notch lodging and dining options. Our Everest Base Camp package includes three full-board meals: breakfast, lunch, and dinner, complemented by tea or coffee at each meal. Throughout the trek, you can choose your meals from the teahouse menu, which offers a variety of local and international dishes, ensuring you maintain energy levels with nourishing meals.

You have the flexibility to opt for Nepali, Western, or Indian cuisines during the entire trek, and the cost of food is covered in the package, allowing you to relish your preferred meals. We highly recommend trying Dal and Bhaat, a typical Nepali dish. For day hikes, it’s beneficial to carry energy bars or dried fruits and stay well-hydrated.

For health reasons, we strongly advise against consuming non-vegetarian items throughout the trek.

Typical Day during EBC trek:

Your trek officially begins upon your arrival in Lukla. Each day, a typical routine commences with a substantial breakfast served between 6:30 to 7:30 AM. After breakfast, you set out on your trek, progressing toward the planned destinations. Before starting the trek, it is advisable to pack all the essentials for the day hike in your backpack, while your duffel bags will be carried by the porter at their own pace.

Throughout the journey, you will make regular stops for short breaks to hydrate, have snacks, or capture photos. Typically, after three to four hours of trekking, a lunch break is scheduled along the route.

Upon reaching the designated overnight stay, you have the opportunity to relax or explore the surrounding area. In the evening, around 6 to 7 PM, dinner will be served. Following dinner, you can engage in conversation with your guide, who will also brief you about the plan for the next day. Subsequently, you can choose to retire to bed or spend your time playing cards, reading books, or simply relaxing at your own pace.

About Wifi, Charging, and Electricity Facility in Tea Houses:

Upon your airport arrival, it is recommended to acquire a Nepali SIM card (with Ncell being a suggested choice) for the duration of your entire trek. You can opt for a tourist data pack that remains accessible for most of the trek, covering locations like Lukla, Namche, Phakding, and Gorakshep. While teahouses generally offer WiFi facilities, there are additional charges ranging from approximately 300-500 per device. Hence, having a data pack proves beneficial in these regions.

In Tyangboche or Deboche, Dingboche, and Lobuche, you can obtain a WiFi card from Airlink. They offer an unlimited internet package at the cost of NRS 700 for 24 hours and NRS 1200 for 48 hours. This Airlink WiFi is accessible in almost all teahouses along the way but can only be logged in on one device.

For charging, an extra fee is required, depending on the devices and duration. Free charging is available until Namche, where there is an electricity supply. However, after Namche, particularly from Dingboche onward, all teahouses rely on solar energy, and charging your devices is not free. The pricing for charging varies from place to place. Note that charging may be slow and challenging at times due to low solar energy.

Best season for Everest Bsae Camp trek 14 Days:

The key ingredient for a successful Everest Base Camp trek is timing it right. The optimal seasons for trekking are spring (March to May) and autumn (November to December). However, it’s worth noting that during these peak seasons, the trail tends to be crowded with fellow trekkers. If you prefer a less crowded experience, choosing the shoulder times such as post-monsoon and pre-winter is an option, and Nepal Peak Adventure can seamlessly arrange it for you.

Preparation for trekking in Nepal is a crucial aspect, and when it comes to packing gear, careful selection of the right materials is essential. A well-thought-out preparation and packing strategy contribute significantly to the success of the trek.

We conduct a thorough packing list check during the briefing session in Kathmandu and provide you with a company duffel bag. It’s important to note that there is a weight limit of 20 kg for luggage carried by our porter, with one porter assigned for two trekkers. Therefore, each trekker’s luggage weight should not exceed 10 kg. We kindly request you to pack accordingly.

From headwear to footwear, here is the list of gear you will need to complete the trekking in Nepal properly.

Basic Gears and Equipment:

  • Duffle Bag (Company will provide you with a 50-70 liters duffle bag)
  • Day Pack (35-45 liters recommended) with rain cover
  • Trekking Poles (1 pair)
  • Four-season sleeping bag (can be rented at Thamel)
  • Sleeping bag liner (optional)

Personal First Aid Kit and Medications:

  • Our guides will carry a first aid kit provided by the company. However, you can have your own with the consultation of your doctor.
  • Water bottle / Water bladder

Headwear:

  • Beanie (1 Nos)
  • Sun hat or Cap (we provide a free company cap) (1 Nos)
  • Polarized Sunglass (1 Nos)
  • Buff/Neck Gaiter (1 Nos)
  • Headlight (1 Nos)

Body Wear:

  • Insulating layers/thermal wear (2 pairs)
  • T-shirt (2 pairs)
  • Full sleeve t-shirt (thin and thick) (1 each)
  • Waterproof and windproof outer layers (1 Nos)
  • Fleece jacket (1 Nos)
  • Down jacket (Company provides)

Lower Body:

  • Hiking Pants (2 pairs)
  • Comfortable pants for the teahouses (1 Nos)
  • Hiking shorts (optional)
  • Waterproof and windproof pant (optional)

Hand Wears:

  • Fabric liner gloves (1 pair)
  • Hard-shell outer glove (1 pair)

Feet Wears:

  • Fabric warm socks (2/3 pairs)
  • Hiking socks (2/3 pairs)
  • Trekking boot high ankle with a good grip recommended (1 pair)
  • Casual shoes for the teahouses
  • Gaiters (optional)

Personal Utilities:

  • Undergarments (according to your needs)
  • Pajamas or sleeping clothes (optional)
  • Sunscreen cream
  • Toothbrush and toothpaste
  • Toiletries
  • Snacks (chocolates, dry fruits, energy bars, etc.)
  • Playing cards
  • Power banks

Documentation:

  • Valid passport and necessary permits
  • Nepal visa
  • Extra passport-sized photos
  • Travel insurance details
  • Emergency contact information
  • Money (local currency and small denominations)

Note: Most of the gear can be rented in Thamel, Nepal, so you don’t need to carry heavy luggage. Also, some of the gear will be provided to you by Nepal Peak Adventure.

“Feel free to inquiry or ask any question. We love to chat with avid travelers like you.”

    why-nepal-peak-adventure-is-expert-in-trekking

    10%-25% Deposit Service Available to Book any Package | Secure Online Payment System

    Government Registered Comapny | Check our Legal Documents 

    We are a Eco-Friendly Tour Operator | Eco-friendly Guides & Porters 

    Licensed English Speaking Guide | Trained for any Emergencies 

    No hidden charges, 100% money return upon cancellation of trip | See our Cancellation Policy

    Book This Tour
    0

    We are Affiliated With:

    Login